When you install Windows 7 and Windows 8 you will find
that your desktop has only the Recycle Bin icon and any other icons
enabled by your computer manufacturer. If you wish to add other icons
such as the Computer, Network, Control Panel, and your User's Files icon
you will need to perform a few easy steps. Before we continue, I will
describe what the purpose of each of the Windows desktop icons are so
that you can decide whether or not you want them to appear on your
desktop.
To change what icons appear on your desktop simply right-click on an empty portion of your desktop to bring up a menu similar to Figure 1 below.
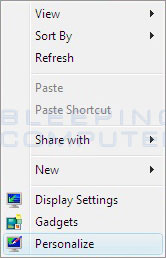
Figure 1. Personalize Menu
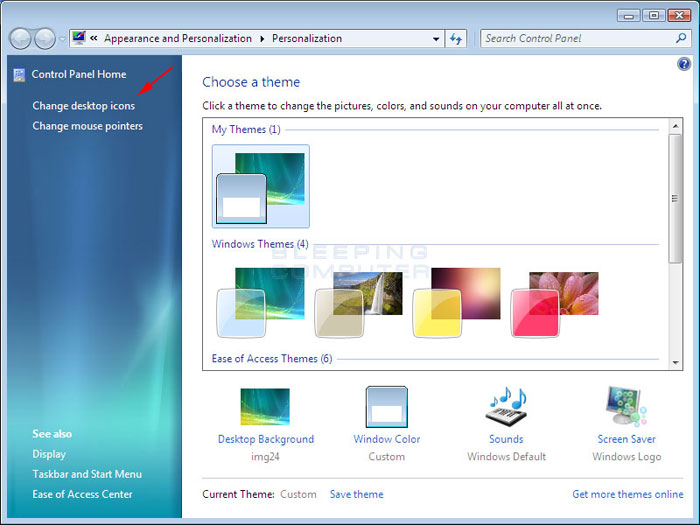
Figure 2. Windows Personalization Screen
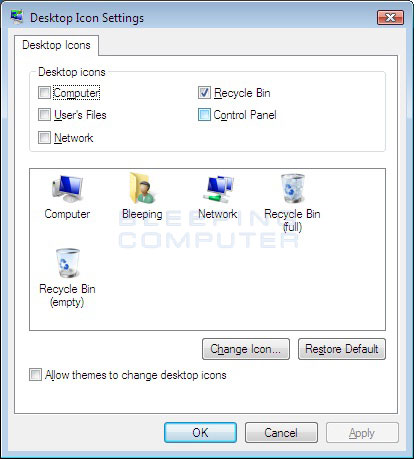
Figure 3. Windows Desktop Icon Settings screen
The descriptions of each of these icons are as follows:
-
The Computer desktop icon provides access to all of
your computer's hard drive partitions, floppy drives, CD or DVD drives,
and removable media drives. When you open this desktop icon you will be
shown all of the available drive letters, which you can then access as
needed. On the left-hand menu you will also see quick shortcuts to
various Windows locations such as your Desktop, Favorites, and
Libraries. Personally, I think this is a good icon to have on your
desktop.
-
The Network icon will show you a list of computers on
your network as well as provide easy access to any Homegroups,
Workgroups, or Domains you may be part of. Unless you have a home
network and need to regularly access the resources on your network, this
icon is not necessary to have on your desktop.
-
The Recycle Bin is a special folder that is used to
hold files and folders that you deleted. This folder allows you to
restore any files or folders that were deleted and that you need to
access again. I suggest that you always have this icon on your desktop.
-
The Control Panel icon will open up a Window
containing a variety of applets that allows you to view and change
various Windows 7 and Windows 8 system settings. It is not necessary to
have this icon on your desktop and can be accessed via your Start menu.
- The User's Files icon provides quick access to your personal data such as your Personal Documents, Personal Downloads, Personal Music, Personal Pictures, and Personal Videos. I suggest that you have this icon on your desktop for quick and easy access to your personal data.
To change what icons appear on your desktop simply right-click on an empty portion of your desktop to bring up a menu similar to Figure 1 below.
Figure 1. Personalize Menu
You should now click on the Personalize menu option. Once you click on that option the Personalization window will appear as shown in Figure 2 below.
Figure 2. Windows Personalization Screen
Now you should click on the Change desktop icons menu
option as shown by the red arrow in Figure 2 above. This will bring you
to the Desktop Icon Settings screen as shown in Figure 3 below.
Figure 3. Windows Desktop Icon Settings screen
At this screen you can select the icons that you want to appear on your
desktop. In order to make it so a certain icon appears on your desktop,
simply put a checkmark next to each icon that you want. You may have
also noticed a checkbox labeled Allow themes to change desktop icons.
If you select this option, when you install a new Windows 7 and Windows
8 theme, the theme is allowed to change the icon used to represent the
various desktop icons. When you are done selecting the icons you want,
click on the Apply button and then click on the OK button. You will now be back at your Windows desktop and you will see the various desktop icons that you have chosen.
No comments:
Post a Comment